sc4goodhealth wrote on Friday, April 24, 2015:
Thank you for the response, fsgl. OpenEMR is working now, although I had to take a different course than you suggested - it is fully documented in this post.
First, though, let me respectfully respond to your suggestion to use a Debian-based OS, like Ubuntu. As we consider a production installation, including multiple installs for redundancy and high availability, our organization must be able to count on support. We have experience with Red Hat Enterprise Linux and feel confident with server support that we could get with Red Hat.
While Canonical now offers enterprise support for Ubuntu, this endeavor would be beyond the scope of our organizational requirements for business continuity, as we simply have no experience with support from Canonical. As an avid Ubuntu user in my personal life, I may experiment on my own time with OpenEMR on Ubuntu, but for our organization, I chose CentOS in anticipation of a move to Red Hat.
As a preface, I am working on a headless server, so I started the process working in Firefox tunneled through SSH, then opened the local firewall for LAN access - instructions for doing the same are included in this post.
Note that some of the relaxed security settings that I am permitting are acceptable for our test installation but will need to be reviewed and tightened before moving our installation to production.
So OpenEMR is working. This is what I had to do.
First, CentOS implements the SELinux kernel security module. I followed instructions at http://wiki.centos.org/HowTos/SELinux to set SELinux’s mode to permissive. Then, I rebooted the system.
sudo nano /etc/selinux/config
This file controls the state of SELinux on the system.
SELINUX= can take one of these three values:
enforcing - SELinux security policy is enforced.
permissive - SELinux prints warnings instead of enforcing.
disabled - No SELinux policy is loaded.
SELINUX=permissive
SELINUXTYPE= can take one of three two values:
targeted - Targeted processes are protected,
minimum - Modification of targeted policy. Only selected processes are protected.
mls - Multi Level Security protection.
SELINUXTYPE=targeted
sudo shutdown -r now
Now, the install proceeded to Step 2, and I chose the option to have the installer create the OpenEMR database for me. However, the install hung on Step 3, while it was attempting to create the database. I spent some time reconfiguring MySQL – as I noted above, CentOS ships with MariaDB, which is said to be a “drop-in replacement” for MySQL, but I wanted my configuration be consistent with OpenEMR’s documented installation procedure.
I observed system logs as I attempted to re-run Steps 2 and 3.
sudo tail -f -n 1000 /var/log/messages
sudo tail -f -n 1000 /var/log/mysqld.log
sudo tail -f -n 1000 /var/log/httpd/error_log
I saw the message:
Can’t connect to local MySQL server through socket ‘/var/lib/mysql/mysql.sock’
I verified that MySQL was running by following the steps at http://www.cyberciti.biz/faq/cant-connect-to-local-mysql-server-through-socket-varlibmysqlmysql-sock-2/ , but I wasn’t sure that I had installed MySQL correctly. I made sure that STRICT mode was not enabled per OpenEMR documentation and MySQL documentation (http://dev.mysql.com/doc/refman/5.0/en/sql-mode.html#sql-mode-full). I still decided to re-install MySQL, and I followed the instructions at http://dev.mysql.com/doc/mysql-yum-repo-quick-guide/en/ to make sure I got it right.
Yet Step 3 was still hanging. Again, I observed system logs as I attempted to re-run Steps 2 and 3.
sudo tail -f -n 1000 /var/log/messages
sudo tail -f -n 1000 /var/log/mysqld.log
sudo tail -f -n 1000 /var/log/httpd/error_log
I saw the message:
PHP Fatal error: Call to undefined function mysql_connect() in /var/www/html/openemr/setup.php on line 237, referer: http://localhost/openemr/setup.php
After some searching, I found that another OpenEMR user had resolved this issue - https://sourceforge.net/p/openemr/discussion/202505/thread/25237742. The solution here was to install the missing php-mysql module.
sudo yum install php-mysql
sudo service mysqld restart
sudo service httpd restart
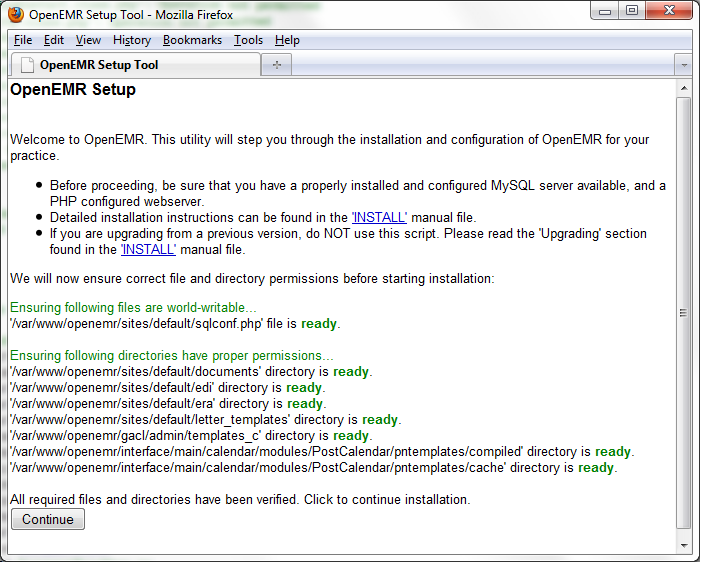
Awesome, I re-ran Steps 2 and 3, proceeded to Step 4 as expected, and the installation finished successfully. I could connect from localhost. If you are working on a headless server and only have an SSH connection, install Firefox and XOrg to access the OpenEMR Web portal. Note that these steps are beyond the scope of OpenEMR installation per se, and I’m including them for a full explanation of the workflow in my environment.
sudo yum install firefox
sudo yum install xorg-x11-xauth
On Windows, download and launch Xming. Configure PuTTy to Enable X11 forwarding. Normally the X display location is localhost:0.0, although you can set up different configurations with Xming’s XLaunch utility.
So I knew OpenEMR was installed properly, and I could access it with the credentials that I established during OpenEMR setup. However I needed to make OpenEMR available on our LAN.
The local system firewall in CentOS blocks most ports from external (i.e. other than localhost a/k/a loopback interface) access by default. Previously, CentOS utilized the iptables program to manage the firewall. Now CentOS uses the firewalld daemon to manage the firewall.
With the following commands, I opened ports 80 and 443 on the local firewall, made the changes permanent, and restarted the firewall daemon.
sudo firewall-cmd --zone=public --add-port=80/tcp --permanent
sudo firewall-cmd --zone=public --add-port=443/tcp --permanent
sudo firewall-cmd –reload
Now, OpenEMR is up and running on CentOS 7, and my colleagues and I can access it over the LAN.